


Splinting upper limb fractures using a splint kit
The most common fractures are usually the ones sustained by the arm or wrist, most of the time because of falling, sometimes because of blunt force trauma. It's a very common injury, that's why you might have not paid much attention to it in a day to day city life, but in the woods, when you have to be the one stabilizing a fracture, the lack of proper technique might cost you the limb. Do you know how to do it? If not, the rest of this post is addressed to you. (Read the other posts if you want a full understanding of what a fracture is and how to spot one)
redacted by @silentnightraider
Basic universal splinting principles:
-immobilize the part above and below the fracture as well
-remove any type of clothing or jewelry that might interfere with the splint and/or cause more damage
-check for capilarry refill and reassess if neccesarry (>2 seconds refill)

1. Fractured Finger (distal/mid/proximal phalanx)-ideal splint size 3.7 inches.
● Remove any rings to prevent further damage caused by swelling (ring is removed in the lower frame of the picture).
● Use your own finger or a casualty's healthy one to form the splint into a ,,U" shape along its lenght, it is going to offer proper protection and stability for the injured finger.
●Place the splint on the affected finger, on the oppsite part of the palm (on the knuckle side). For a thumb fracture, place the splint in a similar manner to the boxer's fracture one, but on the radial side.
● Use medical tape to fix the splint in place, avoid wrapping the tape directly on the fracture if possible.
● Use an elastic bandage to further fix the splint in place

2. Boxer's Fracture (4th or 5th metacarpal bone)-ideal splint size 9in
● Use the casualty's other hand or your own to mold the splint into a ,,U" shape along its lenght,
● Cover the ulnar side of the hand, starting from the tip of the pinky and covering the wrist. (the spling will look like you karate-chopped it)
● Start bandaging from fingers to wrist, leaving the thumb unwrapped, avoid tying the end of the bandage over the fracture

3.Wrist Fracture- ideal splint size 9in or 18in
● Use the casualty's healthy hand or your own to mold the splint, fold around 3 inches of it for finger support, then mold the rest of it around the wrist as shown in the picture, adjust if neccesarry
●Place the splint on the palm side of the hand with the patient's fingers around the resting nest
●Use an elastic bandage to further fix the splint in place, avoid tying the end directly on the fracture
● Apply a sling for increased confort and stability(if possible)

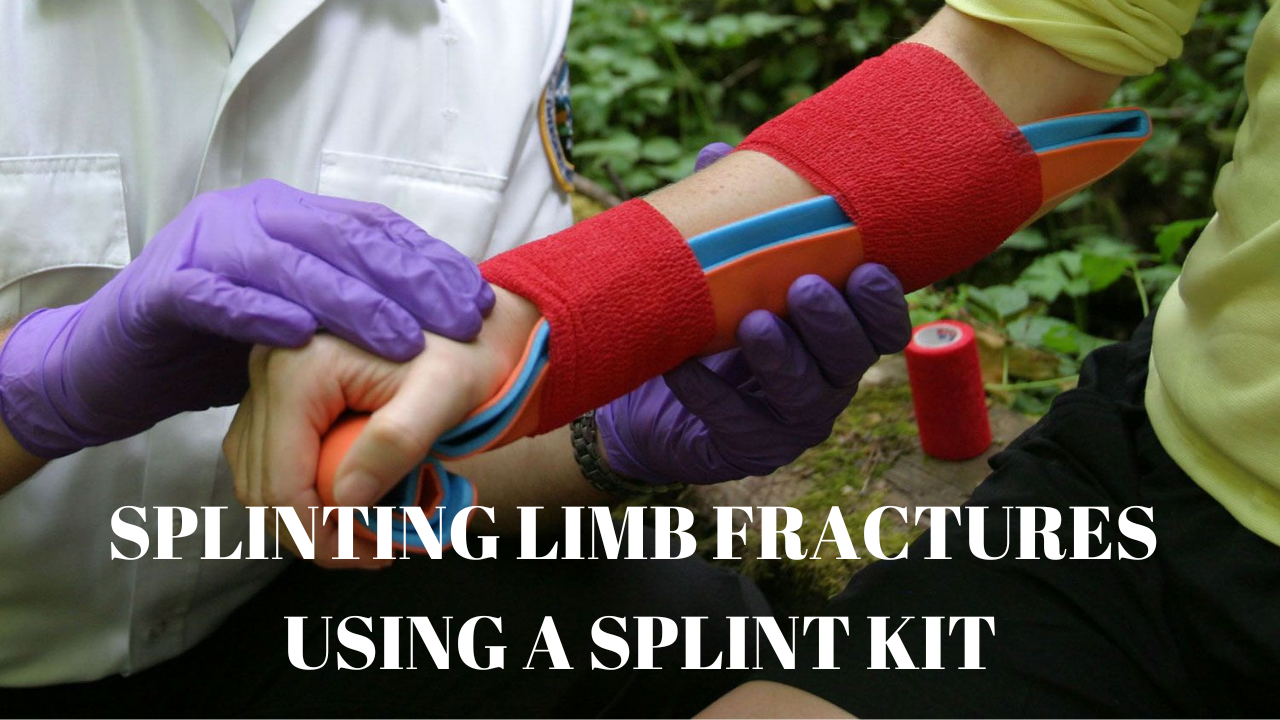
4. Forearm Fractrue (can be used for any regular forearm fracture)- ideal splint size 18in
● Use your forearm to mold the splint in a similar manner to the wrist fracture one, but this time the splint is going to extend to the elbow in order to offer proper stabilization of the forearm.
●Use an elastic bandage to furhter fix the splint in place, avoid tying it directly on the fracture
● Apply a sling for increased confort and stability(if possible)
●Apply a swathe (any bandage or piece of cloth used to further immobilize a fracture) to keep the splint and sling close to the body.(if possible)

5. Both Bone Fracture (I usually prefer to use the sugar tong spling to sabilize a fracture involving both radius and ulna, but it can be used in any situation the regular forearm one can most of the time)- ideal splint size 36in
● Use casualty's healthy hand to mold the splint is a horizontal ,,U" shape in the middle, then along its lenght in order to support the forearm, fold around 3 inches for the fingers resting position as in the forearm one.
●Use elastic bandage to wrap the splint in place, avoid tying it directly on the fracture
● Apply a sling for increased confort and stability(if possible)
●Apply a swathe to keep the splint and sling close to the body(if possible)

6. Humeral Shaft Fracture- ideal splint size 36in
●Use casualty's healthy arm to create a ,,J" shape by folding the splint all around the elbow area, thus forming a 2-layered resting nest for the elbow, and fold the excess material on the shoulder side, then mold the splint in a ,,U" shape along its lenght and around the arm.
●The smaller side of the ,,J" shouldn't get much higher than the beginning of the bicep
●The smaller side of the ,,J" should be placed towards the casualty's body
●Use an elastic bandage to further fix the splint in place, avoid tying it directly on the fracture
● Apply a sling for increased confort and stability(if possible)
●Apply a swathe to keep the splint and sling close to the body(if possible)

7. How to make a sling from a triangular bandage:
●Ask the casualty to support its injured arm with the palm facing parralel to the ground
●Run one corner of the triangular bandage behind his arm and over his shoulder(uninjured side)
●Make sure the arm is centered in the middle of the sling, then run the other corner over the opposite shoulder(injured side) then tie a knot(avoid tying it over the injured side), and adjust the sling so that the wrist is slightly above the elbow level
●Twist the excess material at the elbow and stuff it in the sling, this will make it more stable and comfortable
●Apply a swathe to keep the splint and sling close to the body(if possible)
Applying a swathe:
●A swathe is any bandage or piece of cloth used to further immobilize a fracture
●Wrap the swathe over the injured arm, behind the casualty's back and under the arm on the uninjured side to maximize tha stability of the limb
●Avoid applying the swathe directly on the fracture
●Tie the swathe ends on the uninjured side.

8. How to make an elevation sling (used to control bleeding or to stabilize a clavicular fracture)
●Ask casualty to support injured arm with the fingers pointing towards the opposite shoulder to the injured hand, with the palm facing the body
●Run one corner of the triangular bandage over the shoulder, covering the arm
●Runthe other corner behind the casualty's back and tie the two corners on the back
●Avoid tying the knot directly on the fracture
●Twist and fold the excess material from the elbow area
●Apply swathe is possible
9. Normal Capilarry Rfill (>2 seconds)


