![hiking_kit]()
What Are the Essentials for a Hiking First Aid Kit? The Ultimate Checklist
What Are the Essentials for a Hiking First Aid Kit?
What Are the Essentials for a Hiking First Aid Kit? The Ultimate Checklist
Any experienced hiker is familiar with the prayer of the Ten Essentials, the basic equipment of navigation, light, and food. These are tools that are aimed at averting an emergency. However, there is one important system that is meant to be used when an emergency, no matter how much you tried to prevent it, has already started: your first aid kit. It is the committed instrument of injury management when a map is unable to set a bone and a headlamp is unable to sterilize a wound.
Building Your Kit: The Four Core Pillars
A functional first aid kit is not a random assortment of medical supplies. It is a carefully organized system built upon four distinct pillars. Each pillar addresses a different category of potential medical situations, ensuring you have a comprehensive and easily navigable set of tools when time and clear thinking are of the essence.

Pillar 1: Wound Care & Management
It is the most common part of any hiking first aid kit. It concerns skin ruptures, including small abrasions and more serious cuts.
-
Antiseptic Wipes (6-8): To clean wounds and the surrounding skin to avoid infection. The standard is benzalkonium chloride or alcohol-based wipes.
-
Antibiotic Ointment (1 small tube): This is to be applied on the cleaned wounds prior to bandaging to further prevent chances of infection.
-
Adhesive Bandages (Various Sizes, 10-15): Have different sizes, including small circular bandages and bigger patch-like bandages, knuckle and fingertip bandages.
-
Sterile Gauze Pads (4-6 pads, 2x2" and 4x4"): This is necessary to clean up larger wounds, use as a sterile dressing, and to provide direct pressure to control bleeding.
-
Medical Adhesive Tape (1 roll): Fix gauze pads or bandages. Select a waterproof, strong tape. For extra adhesion in damp conditions, consider adding a small vial of tincture of benzoin.
Pillar 2: Medications
All medications should be clearly labeled and stored in waterproof containers. If you have a known medical condition, consult your physician before assembling this part of your kit.
-
Pain Relievers / Anti-Inflammatories (Ibuprofen, Acetaminophen): Ibuprofen is effective for muscle soreness and reducing inflammation from sprains. Acetaminophen is a good alternative for pain relief. Pack a 12-count of each.
-
Antihistamines (Diphenhydramine): For treating allergic reactions from insect bites, stings, or contact with poisonous plants, and as a first response for severe allergic reactions.
-
Anti-Diarrhea Medication (Loperamide): A gastrointestinal issue on the trail can be debilitating and lead to severe dehydration.
-
Antacids: To manage heartburn or indigestion from trail food.
-
Personal Prescription Medications: Carry at least a two-day extra supply of any personal medications you require.
Pillar 3: Tools & Instruments
These tools allow you to effectively use the supplies in the other pillars.
-
Fine-Tipped Tweezers: For the precise removal of splinters, thorns, or ticks.
-
Trauma Shears / Scissors: Far superior to a knife blade for cutting medical tape, moleskin, or even clothing away from an injury.
-
Safety Pins (3-4): Versatile for securing bandages or fashioning a sling.
-
Disposable Gloves (2 pairs): Protects both the rescuer and the patient from contamination. Always wear them when treating another person's wounds.
-
CPR Mask: A compact barrier device for safely administering rescue breaths.
-
Irrigation Syringe (10-20cc): For flushing debris from a wound with clean water. This is a critical step in preventing infection.
Pillar 4: Emergency & Survival Supplies
These items are for more serious situations that, while less common, require immediate and effective intervention.
-
Emergency Blanket: A lightweight, compact Mylar blanket that reflects body heat to prevent hypothermia in a shock patient or someone exposed to the elements.
-
Triangular Bandage: Can be used to create a sling for an arm injury, as a large bandage, or as a tourniquet in a dire emergency.
-
SAM Splint (or similar moldable splint): A lightweight, reusable splint that can be shaped to immobilize almost any bone in the body.
-
Hemostatic Agent (Gauze or Granules): For severe, life-threatening bleeding that cannot be controlled by direct pressure alone. These agents promote rapid blood clotting.
-
Water Purification Tablets: A backup method to ensure you have safe water to drink or clean wounds if your primary filter fails.
Critical Point: Your first aid kit is your main incident management tool. It is a declaration of independence and an honor to the environment, to rescue workers, and to your friends. But remember, the kit is only as effective as your knowledge of how to use it.
Tailoring Your Kit to The Trail
A first aid kit should not be static. A wise hiker adjusts their kit based on the specific variables of each trip. A generic kit is a good starting point, but a customized kit is a truly effective tool.

Trip Duration and Remoteness
-
Day Hike: A small kit will do on short trips on popular trails. Pay attention to the basics of common issues: a strong blister kit, a variety of bandages, antiseptic wipes, and painkillers.
-
Multi-Day Backpacking: The farther you get off the trail, the larger your kit will have to be. Stock up on all consumable supplies (bandages, gauze, meds). Include more powerful devices such as a SAM splint and an elastic wrap. Make sure that you carry sufficient medication to cover the whole trip and a buffer.
Environment and Climate
-
Desert/Hot Climate: The main risks are dehydration and exposure to the sun. Include electrolyte replacement powders in your kit. Add a tube of aloe vera gel to treat sunburns. Carry additional blister care, since hot feet are susceptible to them.
-
Mountain/Cold Climate: The primary issue is hypothermia. Include a second emergency blanket and a few packets of chemical hand warmer. Make sure that your medical tape is of high quality and will stick in cold and damp weather.
-
Forest/Tropical: There are insects and poisonous plants. Increase your intake of antihistamines. Include a special tick remover and insect bite hydrocortisone cream.

The Smart Choice: DIY vs. Pre-Built?
Once you understand what you need, the next logical question is how to acquire it. There are two paths: building your own kit from scratch (DIY) or purchasing a commercially assembled, pre-built kit.
| The DIY (Do-It-Yourself) Kit |
The Pre-Built Kit |
✅ Pro: Complete control over every item and brand.
❌ Con: Time-consuming to source all components. |
✅ Pro: Can be educational and potentially cost-effective.
❌ Con: Risk of forgetting a critical item or choosing a sub-standard product. |
✅ Pro: Convenient, saving significant research and time.
❌ Con: Less customizable; may include items you don't need. |
✅ Pro: Expertly curated to ensure all essentials are included.
❌ Con: Can be perceived as a less personal option. |
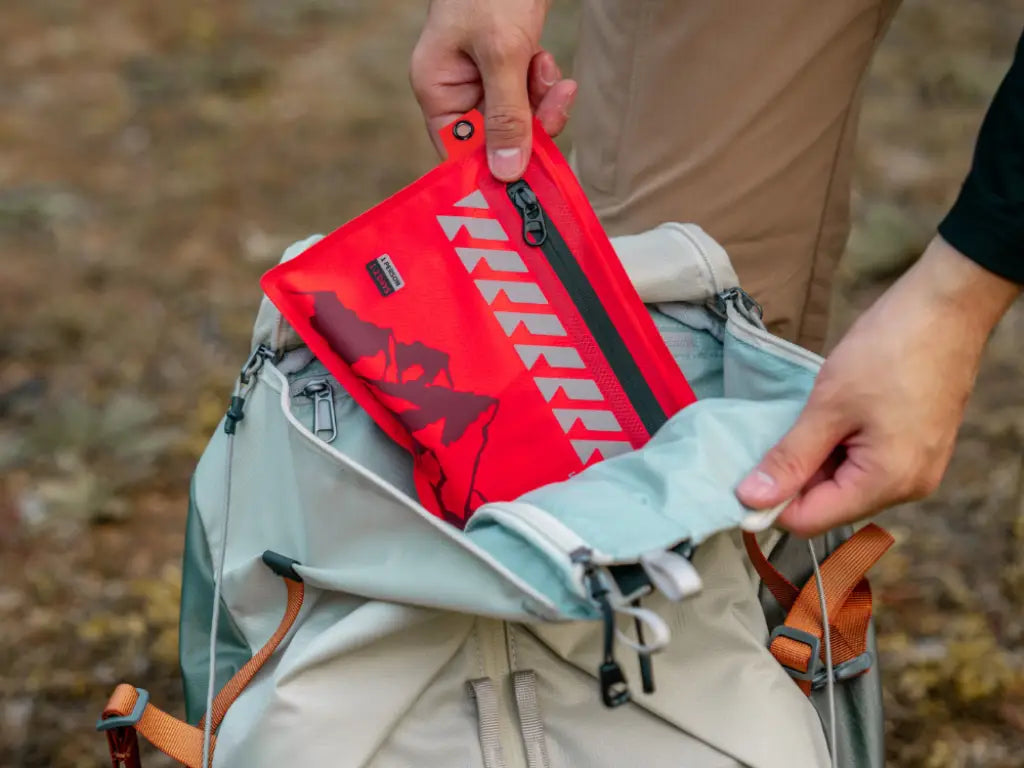
The Rhinorescue Difference: A System You Can Trust
For hikers who value peace of mind and want an expert-curated kit without the guesswork, a pre-built kit is the clear choice. But not all kits are created equal.
Choosing Rhinorescue is not just buying a first-aid kit; it's investing in a professionally designed, battle-tested, and easy-to-use safety system that empowers you to hike with confidence.
-
Tested in the Fire: Our experience is founded on 14 years of performance in the most challenging environments in the world, such as the FIFA world cup, the London Olympics, international relief operations with the Red Cross, and as a reliable supplier to the French military police and Saudi defense forces.
-
Smart, Activity-Specific Design: Ours are not generic kits, but designed to perform particular activities. The hiking kits are light (some are as light as an iPhone), durable, and have easy to use color-coded designs that enable you to locate what you need within a minute in a stressful scenario.
-
High-quality, Certified Parts: All products are of high international standards (FDA, CE certified). The interior has better technology such as our patented hemostatic gauze which can be used to control bleeding much quicker than conventional techniques.
-
More Than a Kit: Your purchase comes with a free access to a first-aid video course. We think that knowledge is as important as supplies and we give our users both.
Explore Trail-Ready Kits Here
Essential Skills Beyond the Supplies
A first aid kit is half the battle. You should also have the fundamental knowledge to be able to utilize its contents. A trauma shear is no good when you do not know when and how to cut away clothing and a bandage on a dirty wound can only cause more harm than good. You need not be a paramedic, but you ought to have mastered these basic skills.
How to Clean and Dress a Wound:
- Using gloved hands, irrigate the wound with clean, potable water with an irrigation syringe to cleanse the wound of dirt and debris.
- Pat the surrounding area dry.
- Apply antibiotic ointment.
- Apply a sterile bandage or gauze pad over the wound. Tape securely, when needed.
Treatment of a Blister:
- In case the blister is small and intact (a hot spot), place it under moleskin cut into a donut shape, with the hole covering the blister itself.
- In case the blister is painful and large, you can decide to drain it. Sterilize a needle, poke a small opening at the edge of the blister, and squeeze the fluid out.
- Use antibiotic ointment and wrap with a hydrocolloid bandage, which will cushion and heal.
How to Identify and Treat Heat Exhaustion:
-
Symptoms: Sweat, faintness, dizziness, nausea, headache, weak and rapid pulse.
-
Response: Take the individual to a cooler, shady place. Get them to lie and raise their legs. Give small amounts of cold water with electrolyte powder. Loosen their clothing. Wet cloths to their body.
Your Pre-Hike Kit Maintenance Checklist
Your first aid kit is not a static item to be packed and forgotten. It requires regular maintenance to remain effective. Before every single hike, run through this quick checklist.
- Check Expiration Dates: Quickly scan all medications, ointments, and sealed wipes. Replace anything that is expired.
- Restock Used Items: If you used a bandage or a painkiller on your last trip, replace it immediately. Do not wait until the next time you need it.
- Inspect All Packaging: Ensure all sterile items remain in their sealed, unopened packages. Check tools for any signs of rust or damage.
- Review Your Route: Consider the specific challenges of your upcoming hike. Are there more water crossings than usual? Perhaps add extra water purification tablets. Is it a known area for ticks? Double-check your tweezers.
- Update Personal Information: Make sure any personal medical information and emergency contacts included with your kit are up to date.
Your First Aid Kit: Your Trail Lifeline
A properly stocked and properly maintained first aid kit is not merely a set of medical supplies. It is a concrete expression of readiness. It is the device that turns what could be a trip-ending event into a minor inconvenience. It is your main tool of self-reliance in a world that requires it.
The preparation of a kit is not to ask disaster; it is to create the self-confidence to confront the unforeseen. It gives you the opportunity to stretch yourself, venture further, and experience the full outdoors beauty knowing that you are prepared to face the usual obstacles of the trail. Think before you pack it, know what is in it, and take it everywhere. It is your personal lifeline.